 Austria
 Belgium
 Czech Republic
 Denmark
 Finland
 France
 Germany
 Greece
 Ireland
 Italy
 Latvia
 Luxembourg
 Netherlands
 Norway
 Poland
 Portugal
 Slovakia
 Slovenia
 Spain
 Sweden
 United Kingdom

The secrets of black and white photos: how to take unique images
Black and white photographs have great evocative power and can capture in a single image the magical atmosphere of a landscape or a scene from everyday life. Discover our tips for taking your own unique shots!

Black and white photography has always held a strong fascination thanks to its evocative, atmospheric power. Shooting in black and white means changing the way you look at the scene in front of you: it isn't enough to change your camera settings or edit the image in post-production; you need to think in B&W from the moment you take the shot.
In this new Pixtury guide, we'll give you tips and ideas for taking beautiful black and white photos. In our collection you'll find wall art for sale featuring all the images we'll show you, which you can use to decorate your walls in a unique style. Here are a few examples.

How to take black and white images
In black and white photography, since there's no colour, attention focuses more on shapes, with the aim of creating strong geometric compositions that draw the viewer's eye. With digital, we recommend shooting in colour and then converting the photo in post-production. Your camera's black and white mode, in fact, simply desaturates the image, creating a false black and white and compressing the tonal range.
Below are some black and white photos taken with great attention to composition.


Capturing a wide tonal range in black and white photos
Ansel Adams's Zone System can help you understand how to capture a wide tonal range spanning values from 0 to 10, where 0 is pure black and 10 is pure white.
The Zone System was devised for film photography, but its principles can also be applied to digital photography: a correct black and white exposure should include all the values from 0 to 10 of the tonal range.
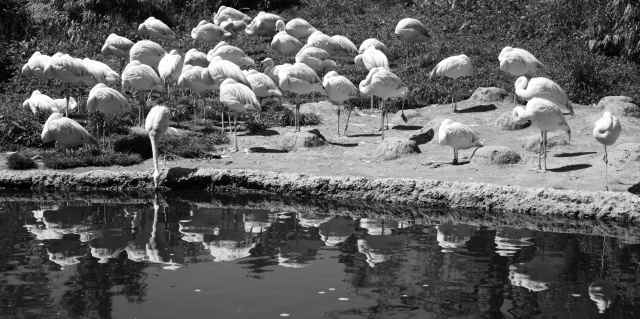
Here is an example of a photograph that includes a wide range of tones across the greyscale.
Technical tips for beautiful black and white images
When you need to convert an image to black and white in post-production, we recommend shooting in RAW format to be sure of keeping all the detail that JPEG usually discards to compress the image.
A very useful tool is the histogram, which your camera also lets you view while shooting. The histogram shows the distribution of tones in the image, from black (on the left) to white (on the right). A well-formed histogram will have an even distribution between the two extremes, rising towards the right.
Here are some evenly exposed photographs from our collection of city prints and wall art, which you'll also find in the dedicated sections of Rome wall art and prints, Milan wall art and prints, Turin wall art and prints and Naples wall art and prints.


When you're photographing a once-in-a-lifetime scene, there's always the fear of getting the exposure wrong and missing the chance of a unique shot. Digital cameras offer bracketing, a very useful function that lets you capture the same image at three different exposures: when you press the shutter, the camera takes one photo at the exposure you've chosen, one underexposed by one stop and another overexposed by one stop. This gives you a margin of error around the exposure you've set, and you can decide in post-production which one is best.
In our collection of canvas prints, you'll find a great many black and white photographs like the ones we've shown you.
Did you find this new Pixtury guide interesting? Share it with your friends!